MedWand KIOSK - Creating and Joining an Onsite Exam
Creating and Joining an Onsite Exam
Creating an Appointment
1. Navigate to https://portal.medwand.com in your Chrome web browser and log in with your provided username and password
Note: We strongly encourage the use of Chrome as it's the most stable and will provide the best experience. Other web browsers can be used, however, you may run into performance issues in the exam room.
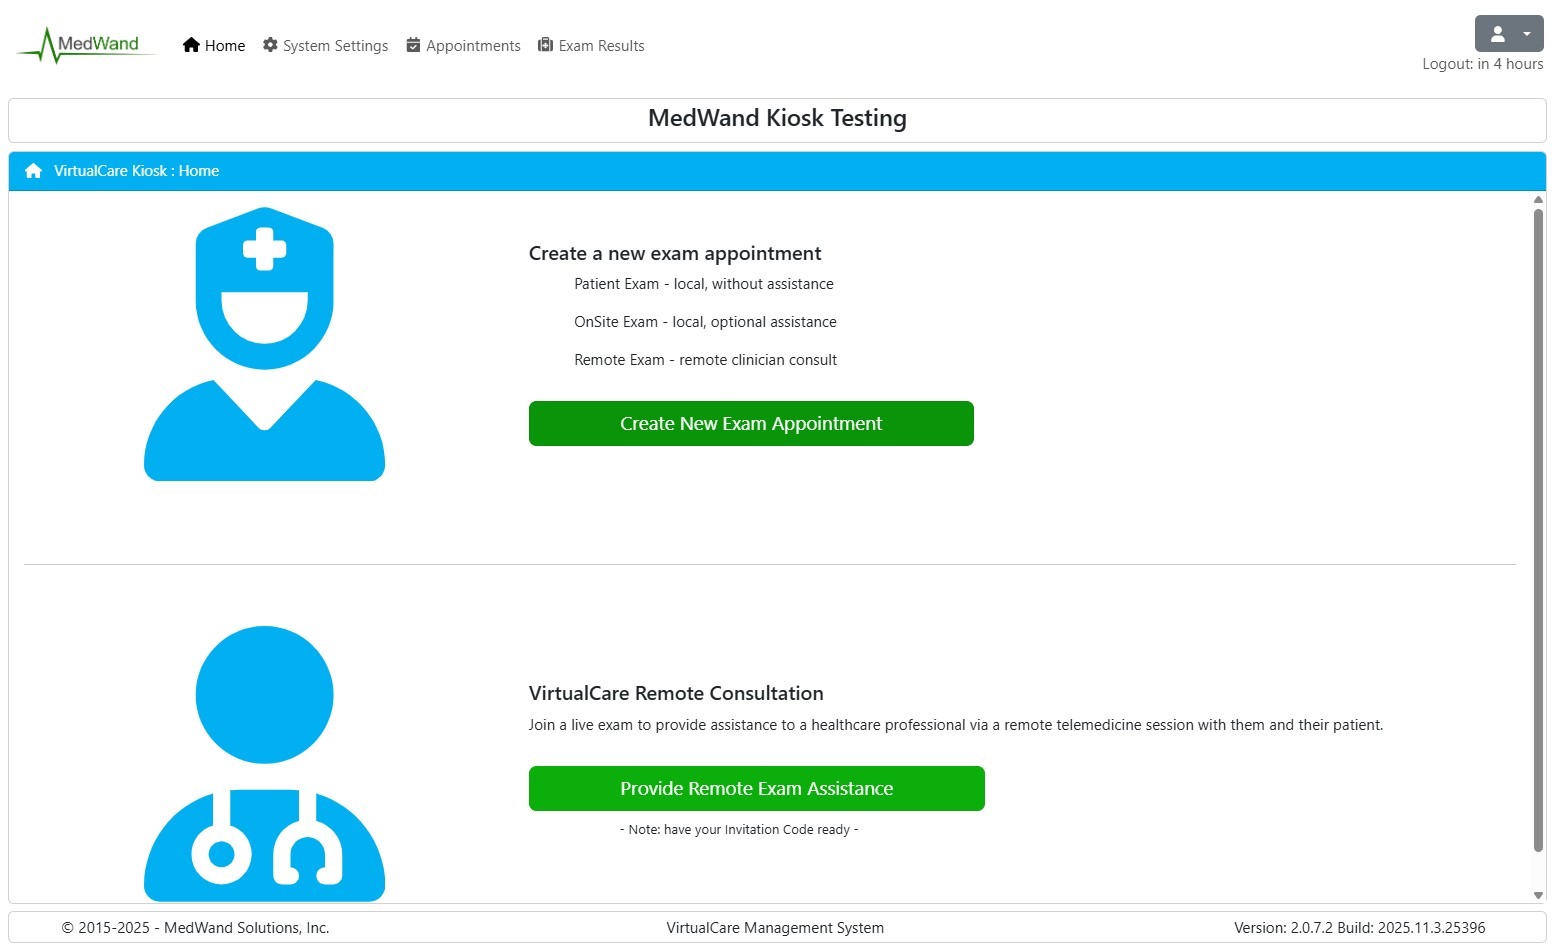
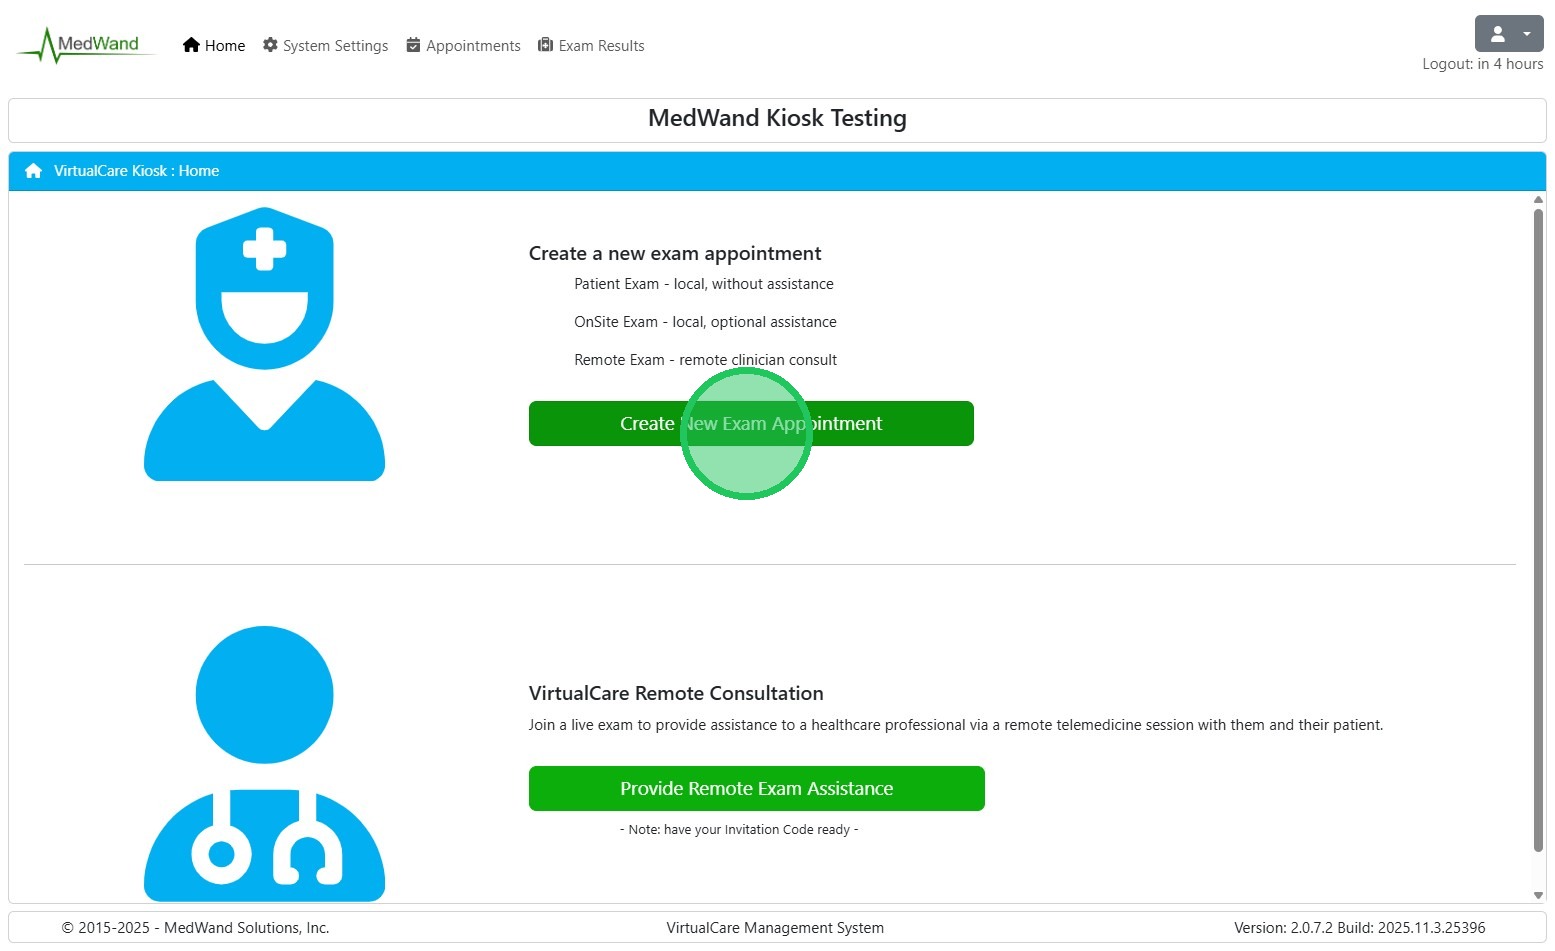
2. Click "Create New Exam Appointment" on the home screen (then skip to step 5)
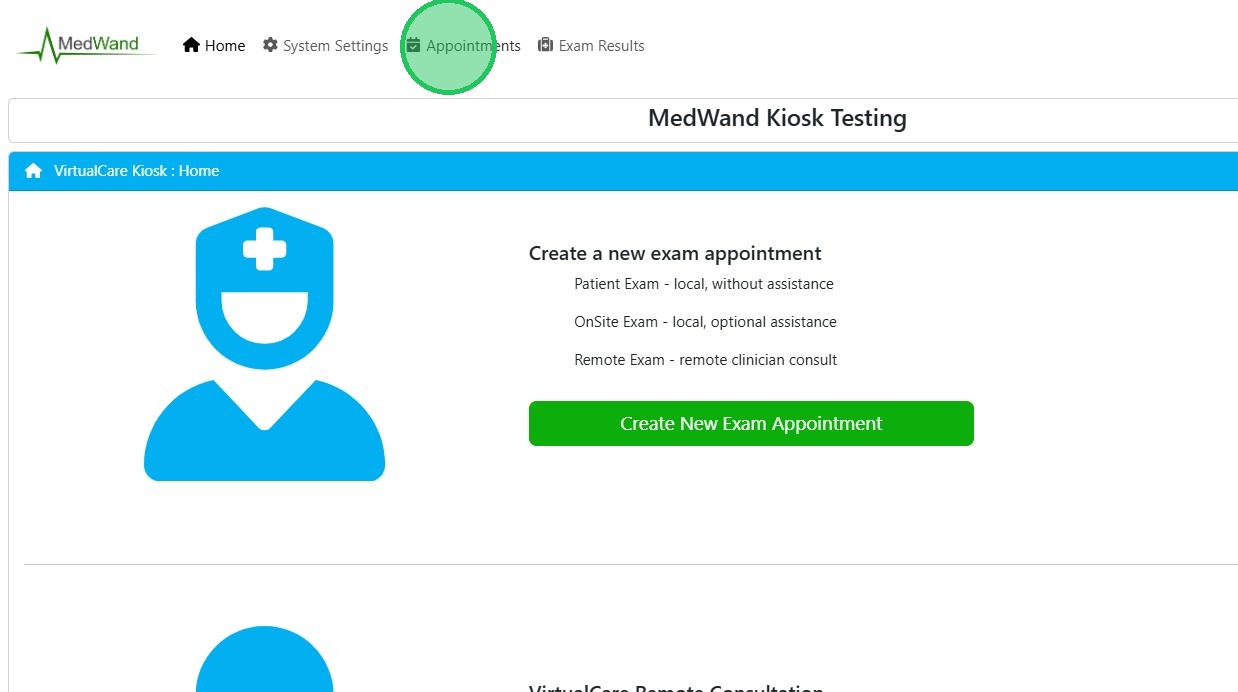
Alternatively, you can also create an appointment by navigating to the "Appointments" tab at the top of the page and selecting "Create Appointment" in the top right. (3-4)
3. Alternate appointment creation method
Select "Appointments" in the top navigation bar
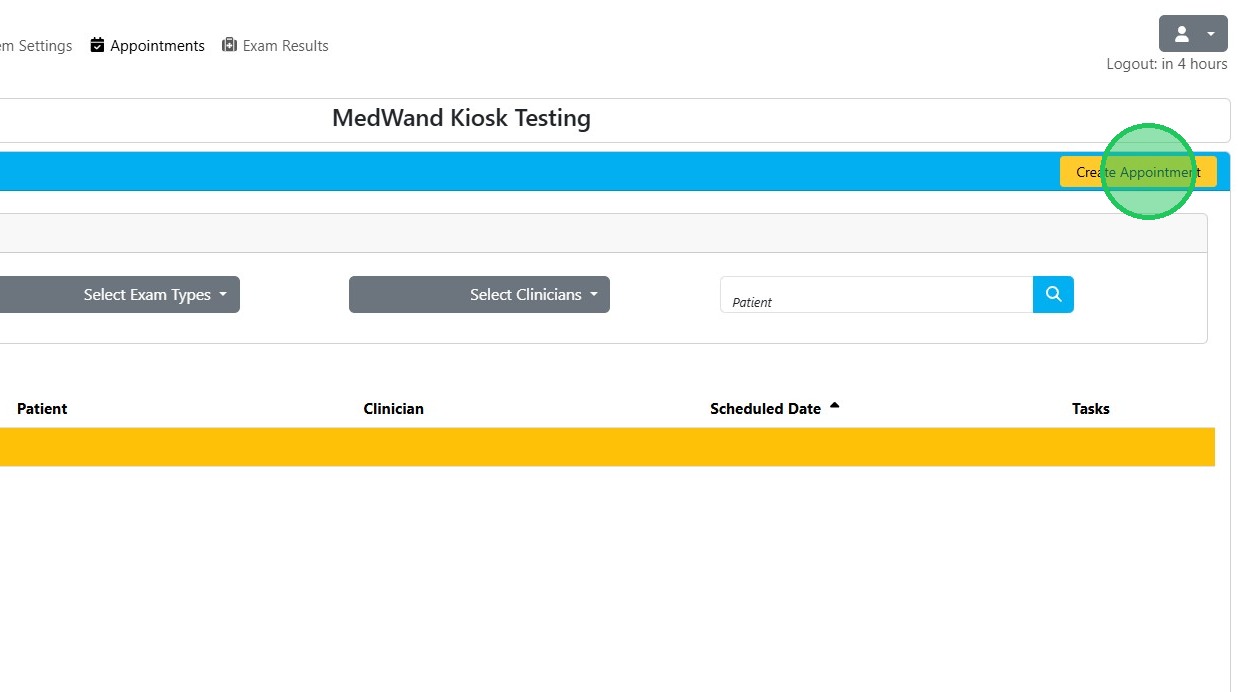
4. Select "Create Appointment" in the top right corner
5. Select or enter the Appointment Type (Onsite Exam), Clinician, Patient Identifier, and Scheduled date and time (optional)
Appointment Types
- A Patient Exam type is intended to create an exam appointment where no healthcare professional will be involved and the patient is expected to use the MedWand device and collect vitals by themselves.
- An OnSite Exam type is intended to create an exam appointment where an onsite healthcare professional will be involved and will use the MedWand device to collect vitals from the patient.
- A Remote Exam type is intended to create an exam appointment where a doctor or authorized healthcare professional will perform a remote telemedicine session with the patient and will supervise the use of the MedWand device to collect vitals from the patient.
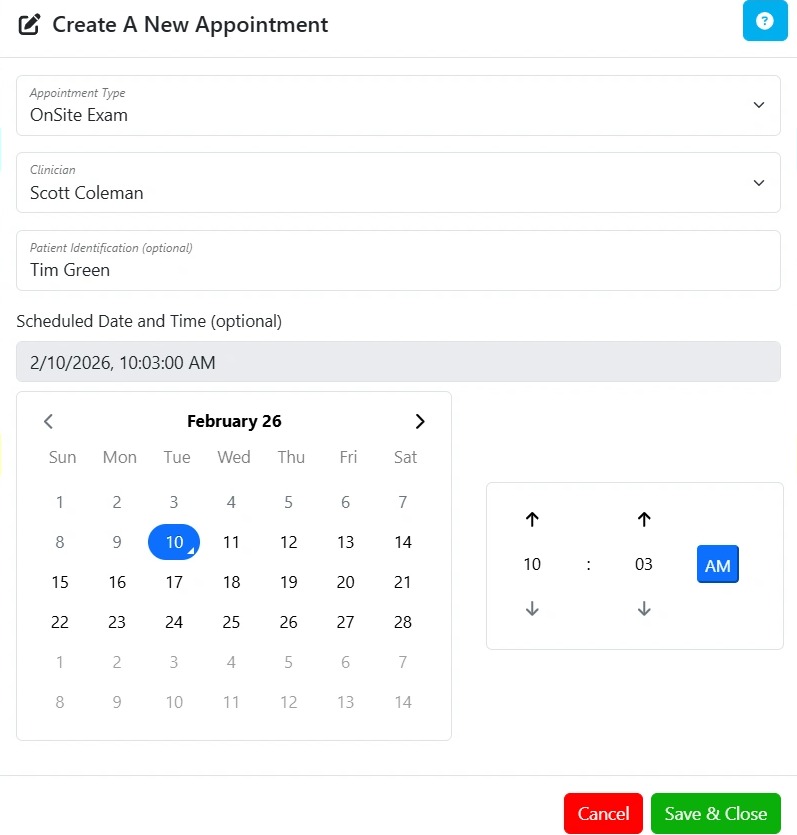
6. Click "Save & Close"

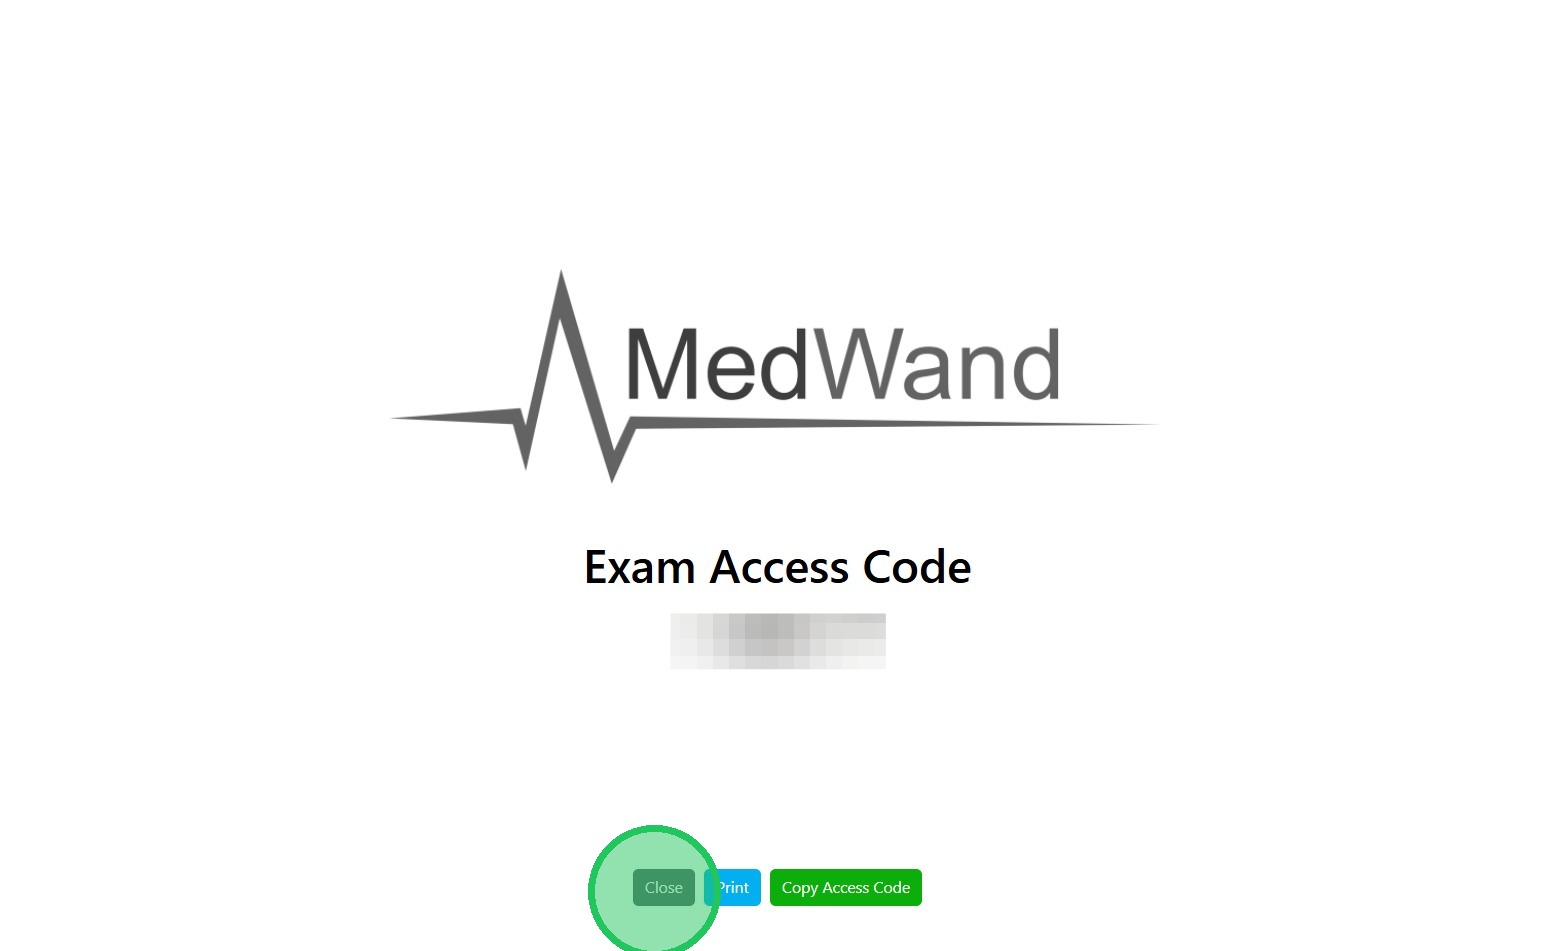
7. You will then be presented with a splash page containing the join code for your patient. You can copy or print the number from this page if desired. If you close this page, you'll still be able to access the exam code from your Appointments screen.
Select "Close" at the bottom of the page
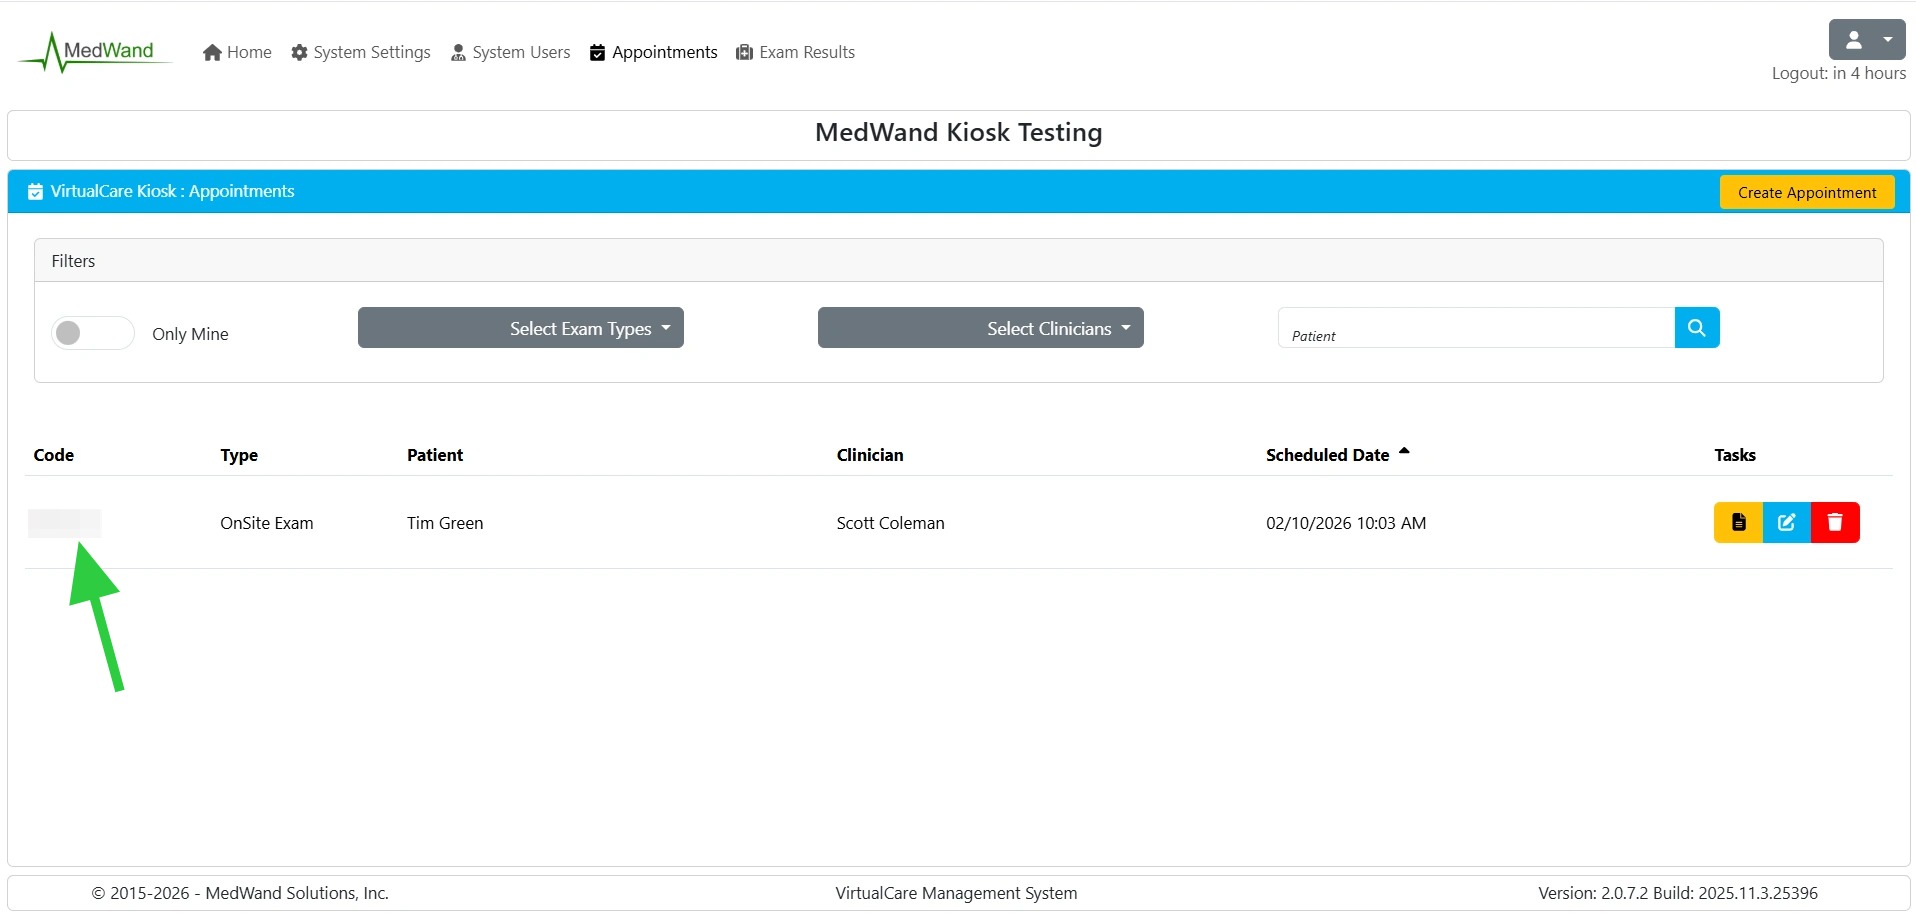
8. You should now be presented with your standard Appointments screen with the new exam appointment listed. The code on the far left is the patient's access code; this is the same number that was presented to us on the previous page and should be provided to the patient to launch the exam on their mobile device.
Joining an Exam as the Patient
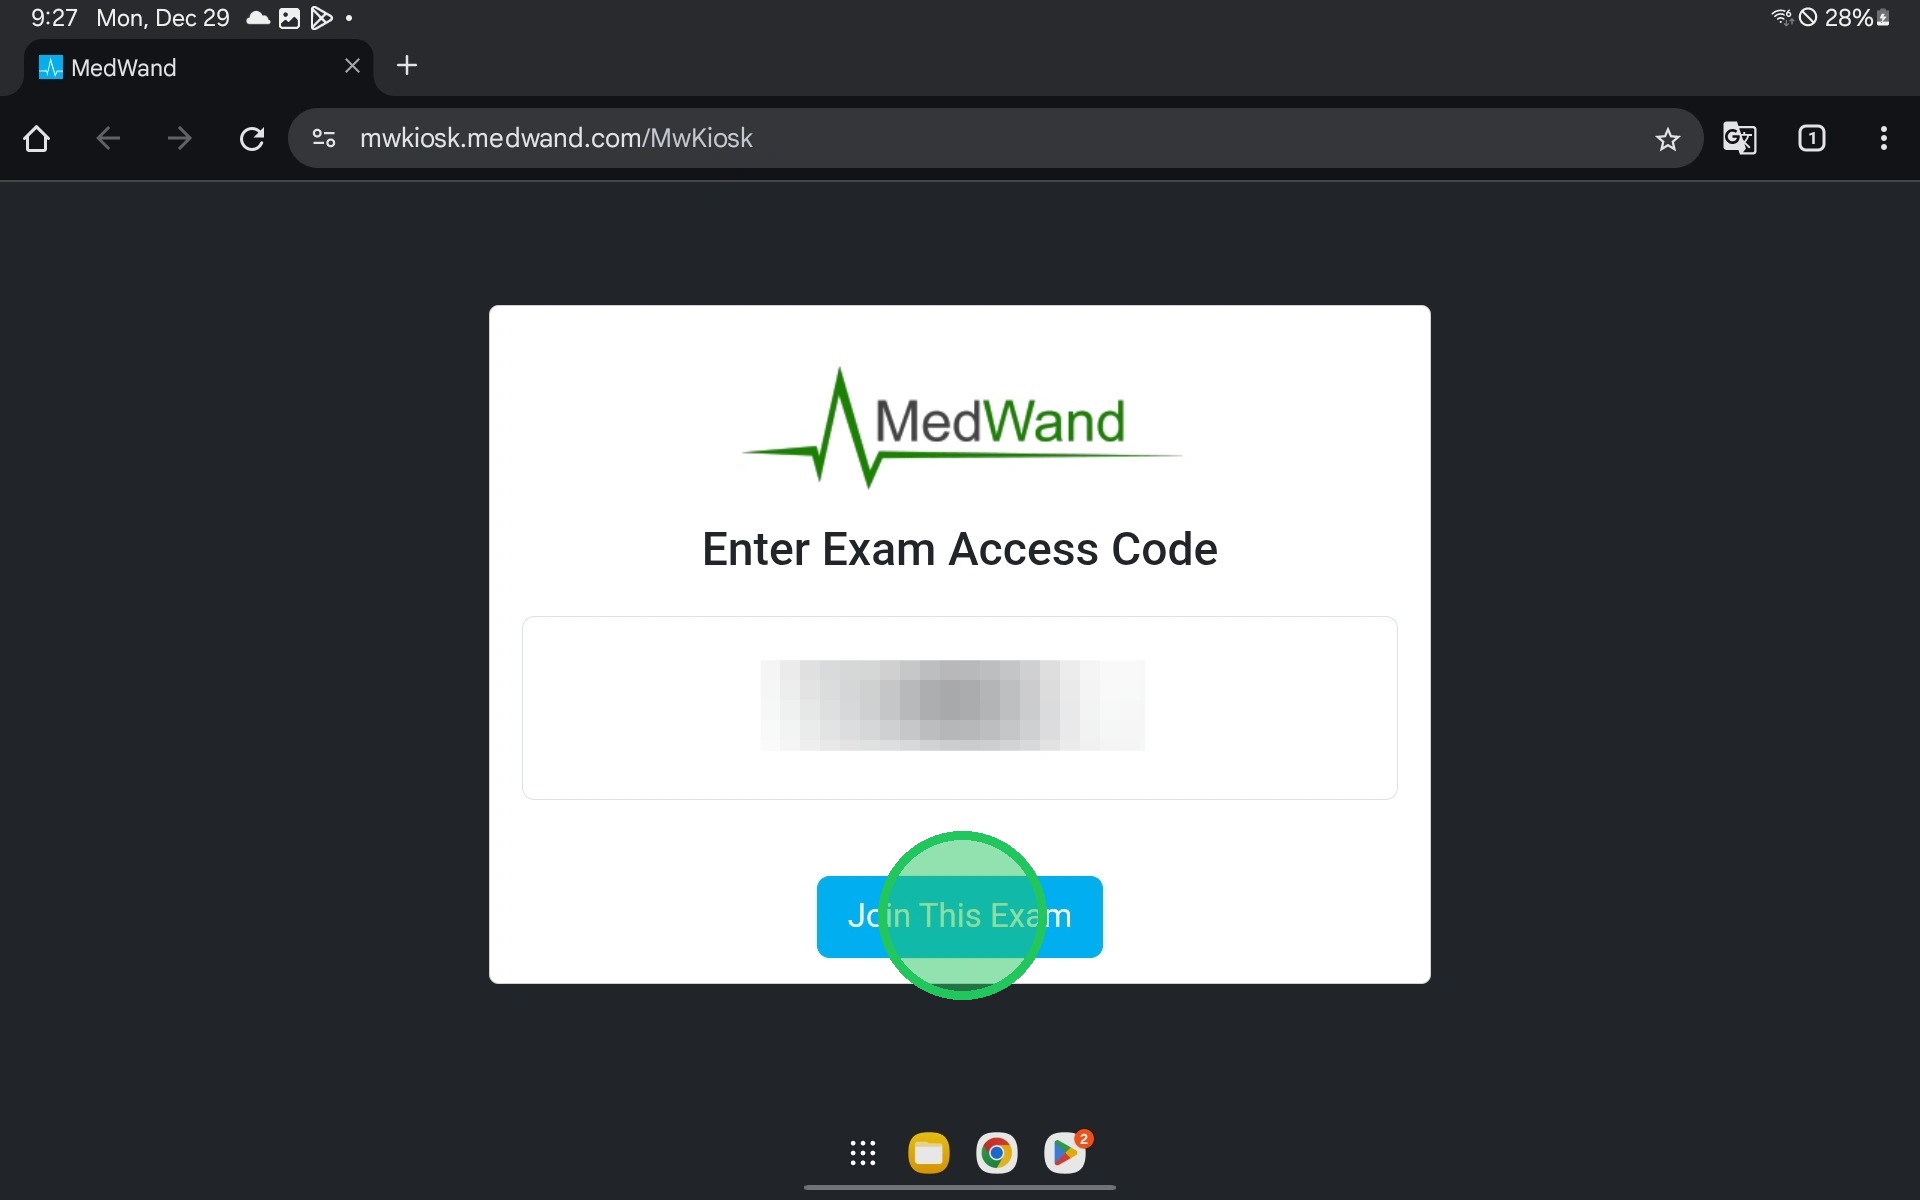
9. The patient will need to navigate to https://mwkiosk.medwand.com/ in the Chrome browser on their compatible Android tablet or phone.
To join the exam, your patient will need to enter their exam code on this screen and select "Join This Exam". Doing so will pull down their appointment information from our server and launch the MedWand VirtualCare App.
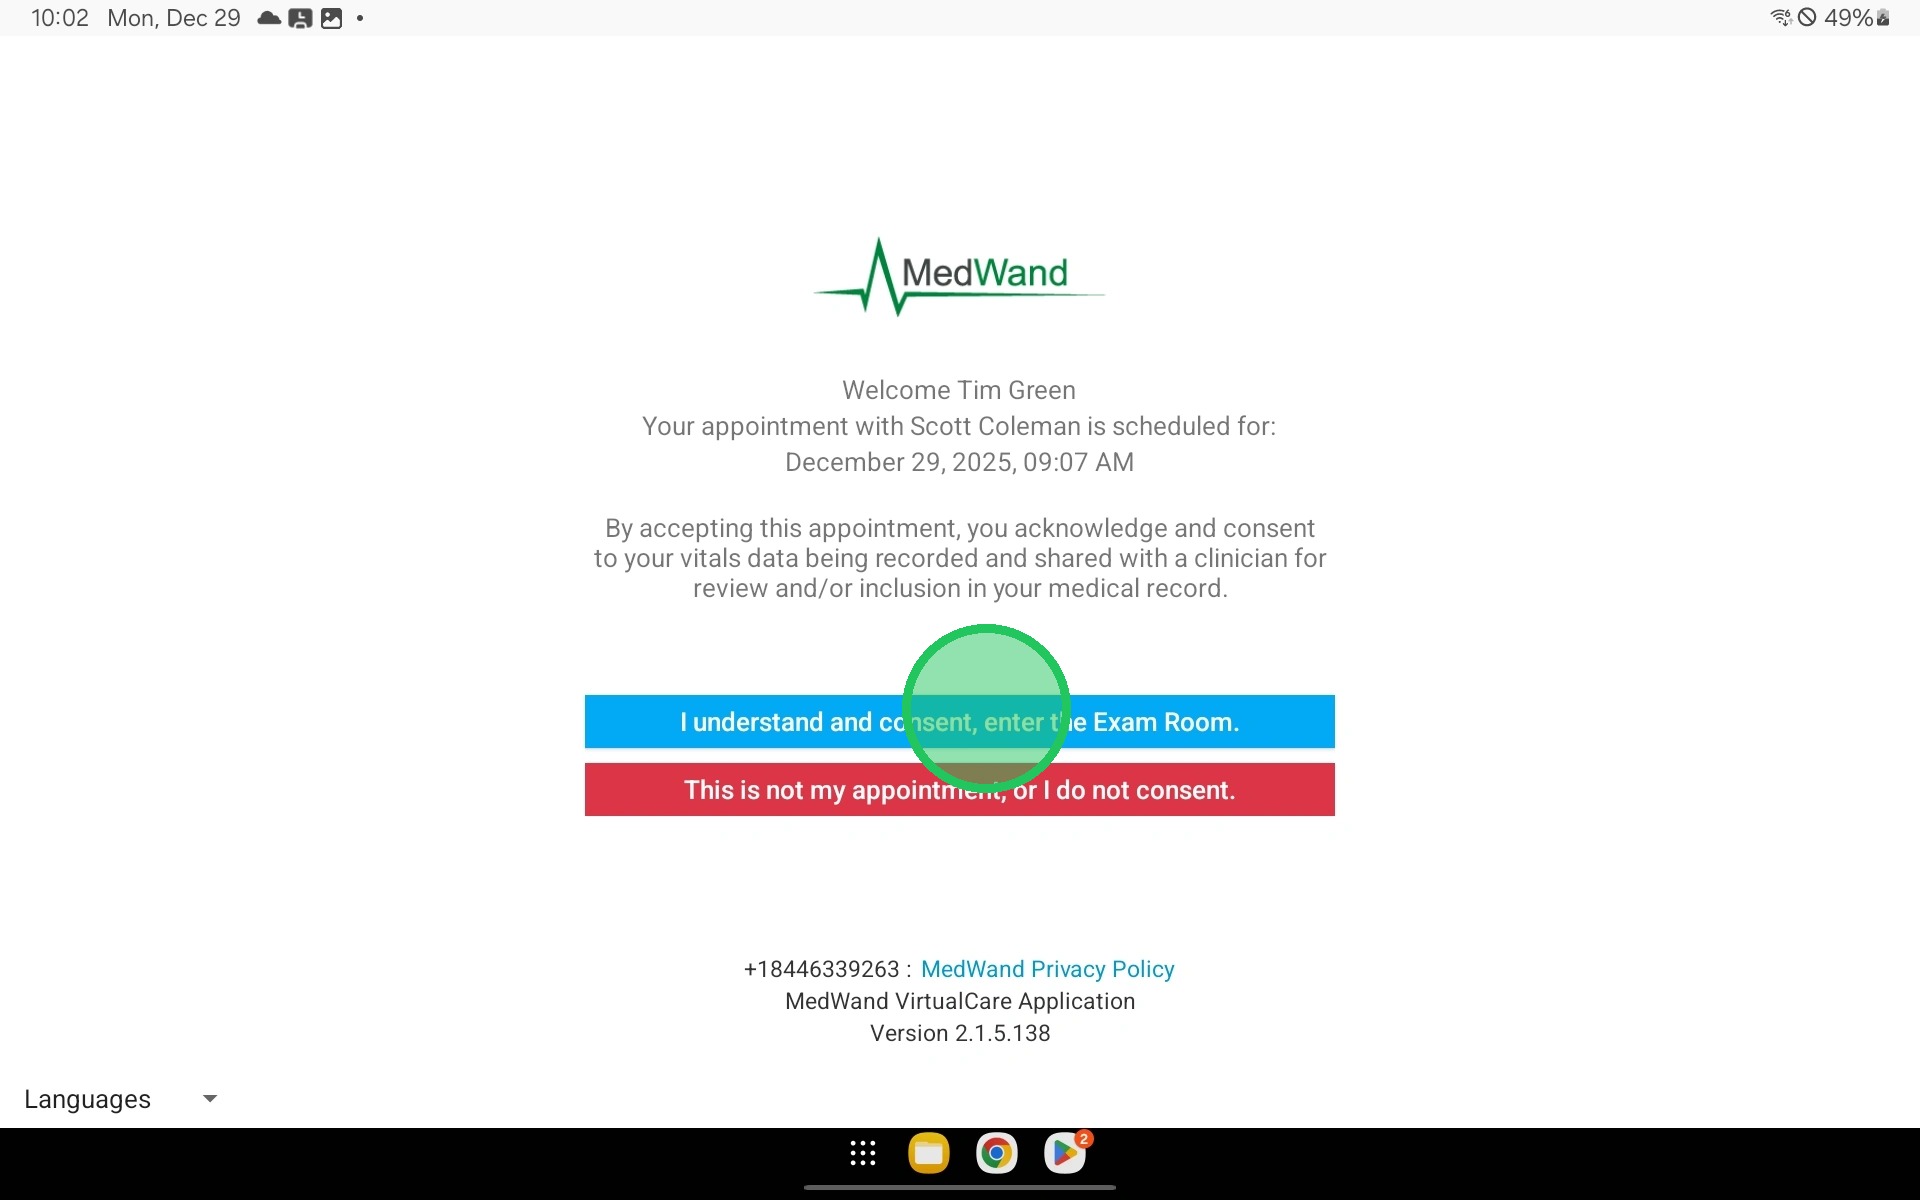
10. The patient will review the appointment consent screen and select "I understand and consent, enter the Exam Room"
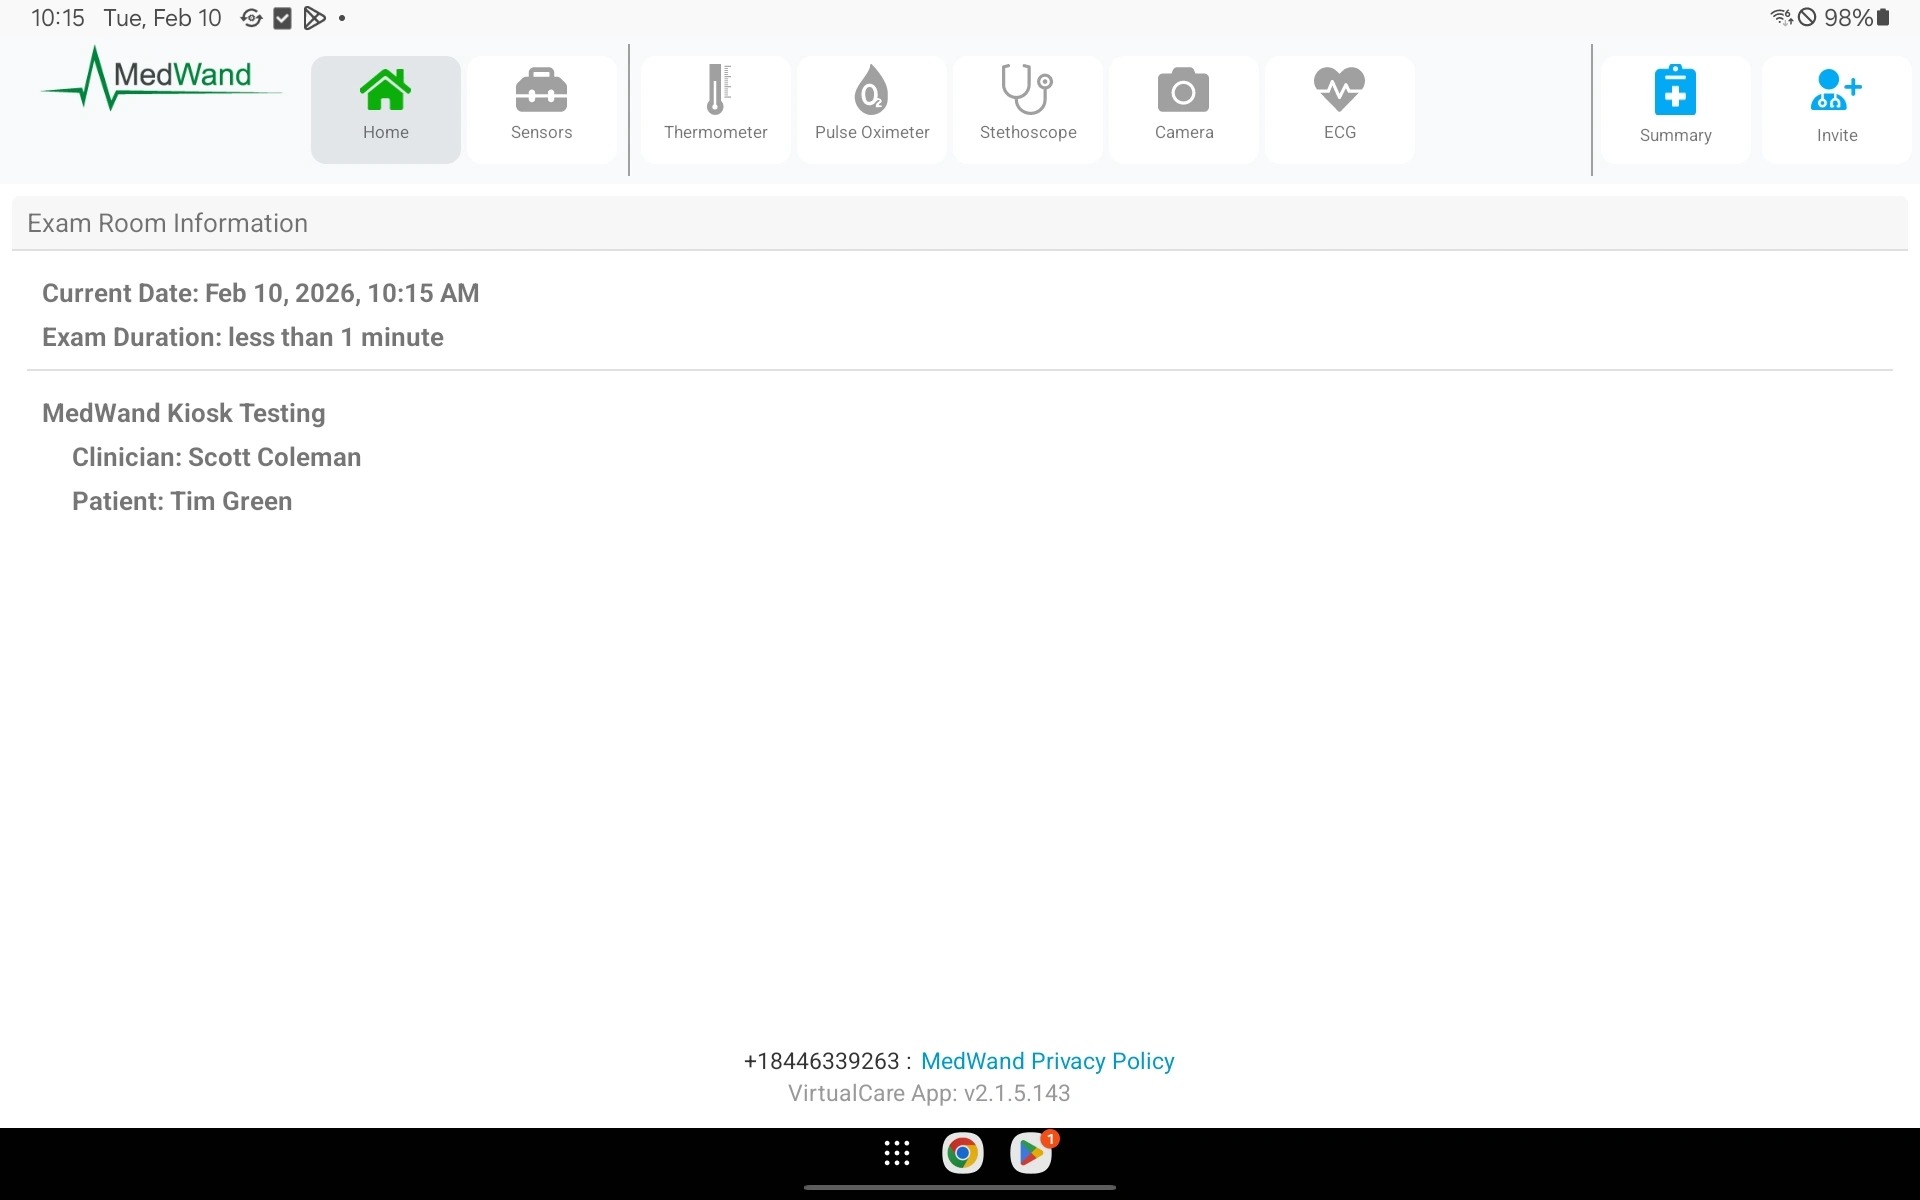
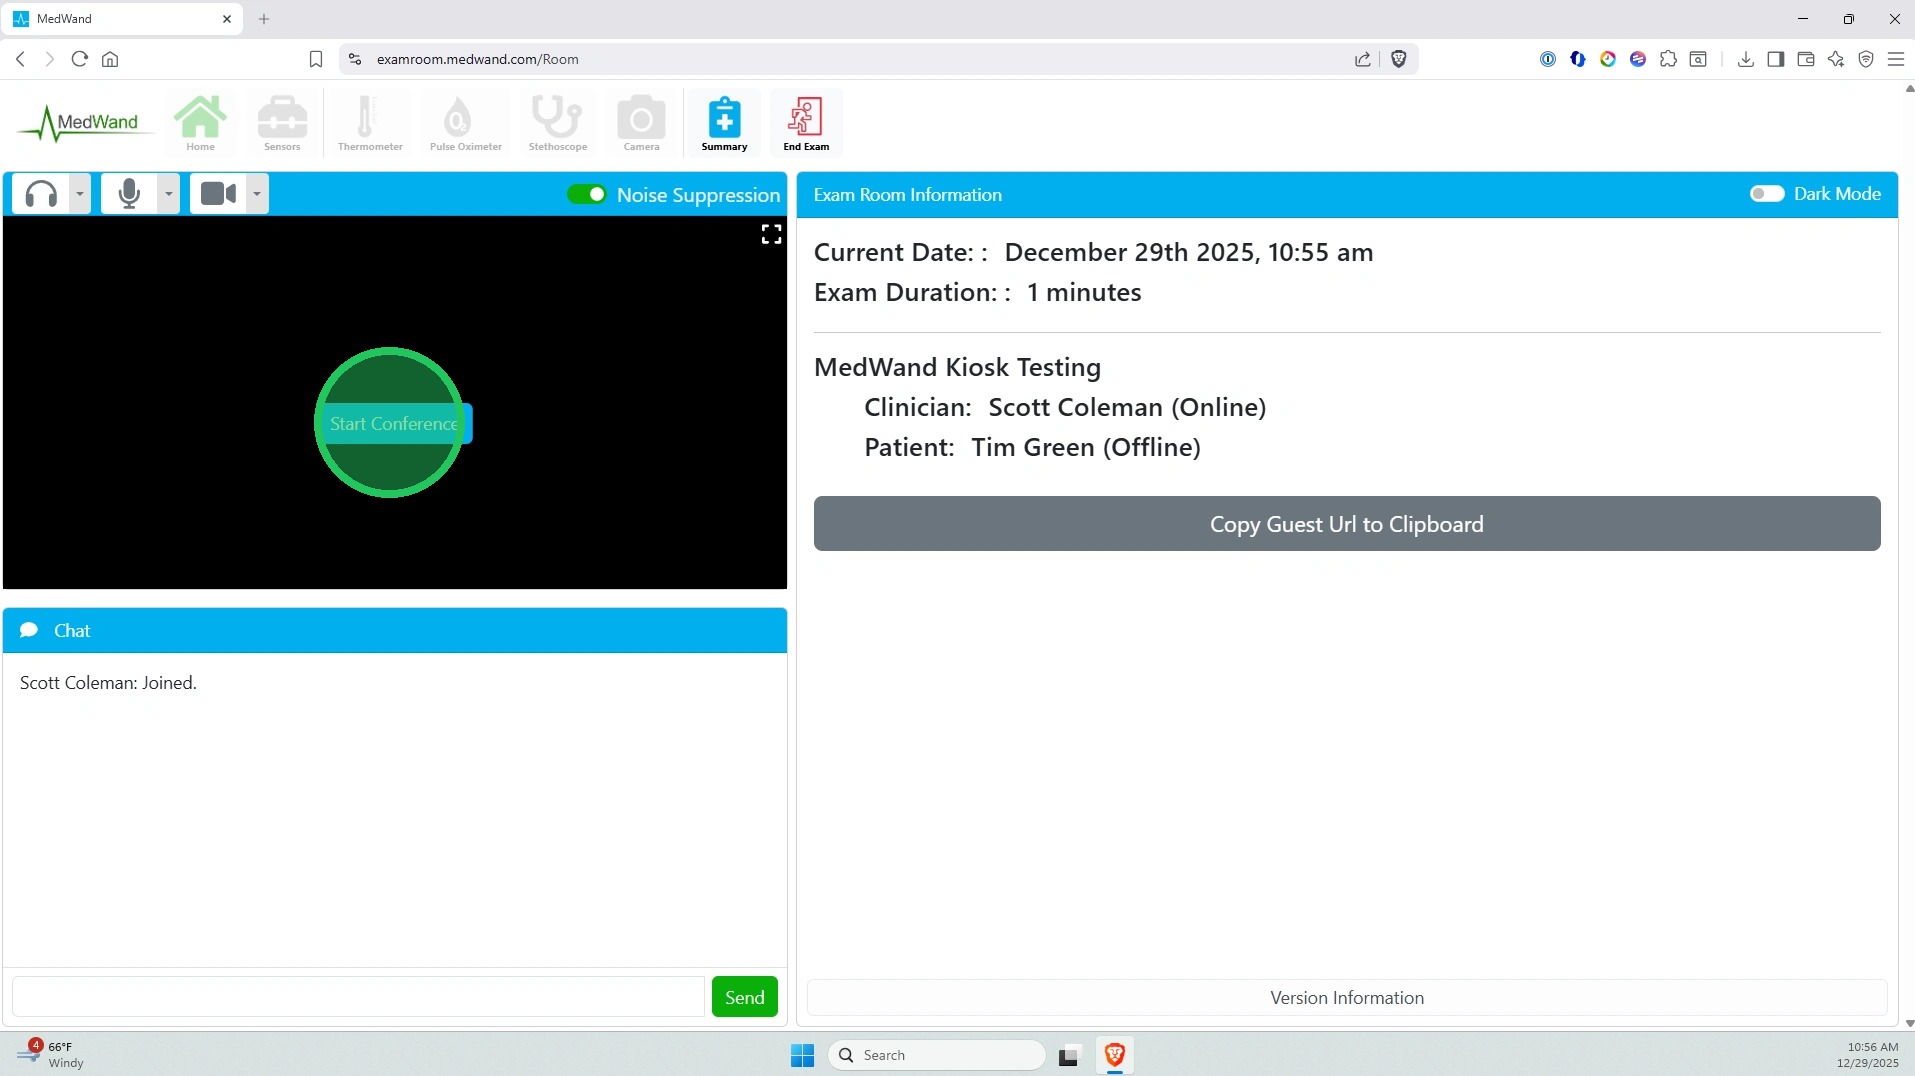
11. Below is what the patient and/or onsite assistant will see upon loading into the exam. From here, the desired sensors can be launched to collect vitals.
Once you've collected all of the necessary vitals, you can either end the exam or invite in a remote clinician to convert the encounter to a full telemedicine session.
End Exam - Proceed to step 12
Invite a Clinician - Proceed to step 14
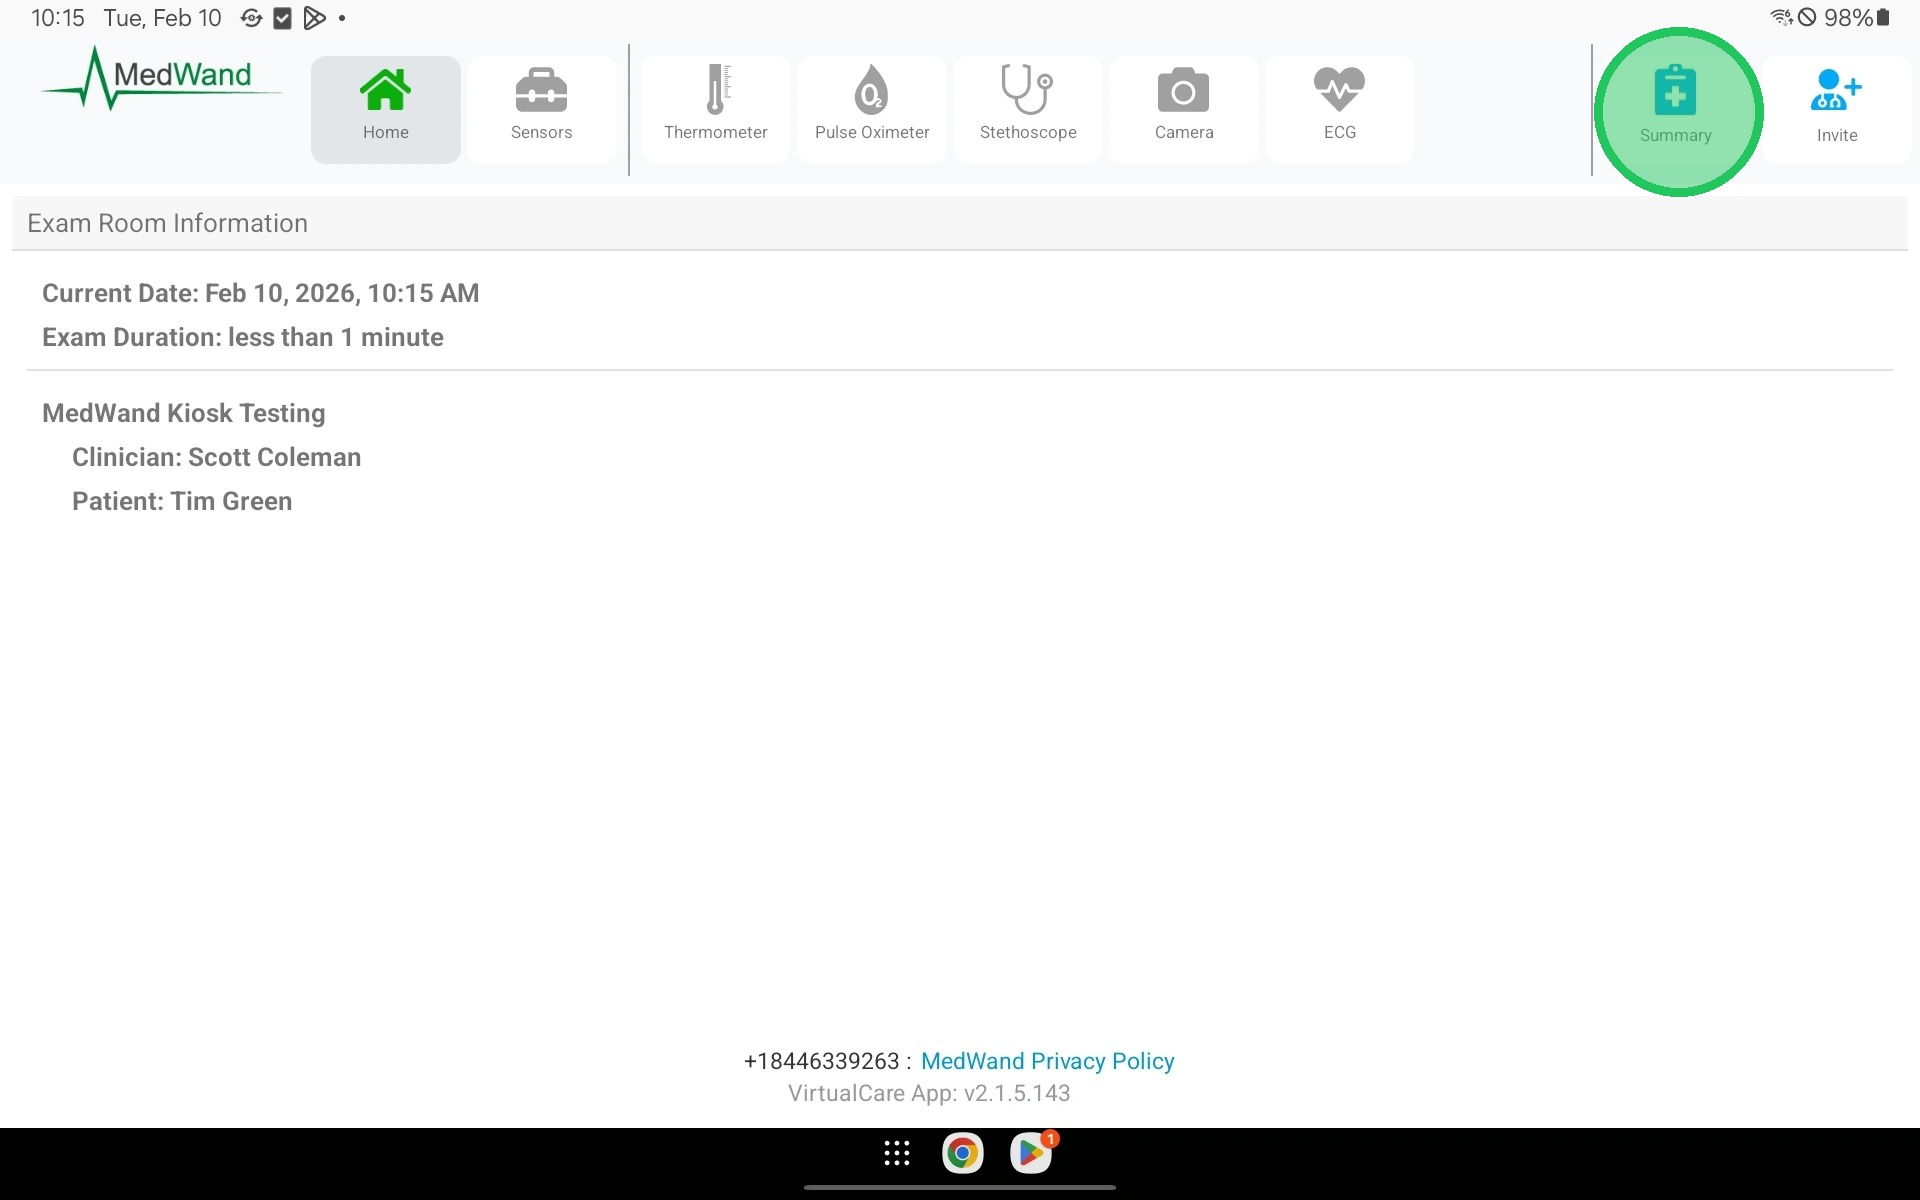
12. Ending an exam without inviting in a Clinician
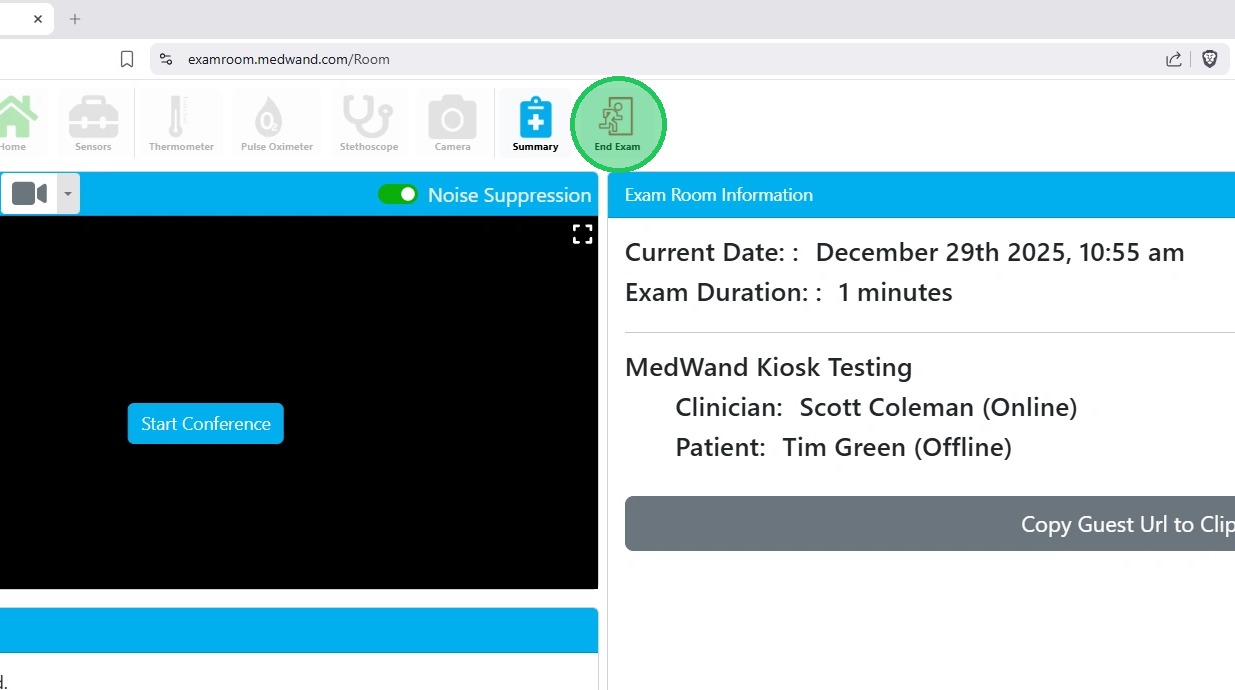
Select Summary in the top right
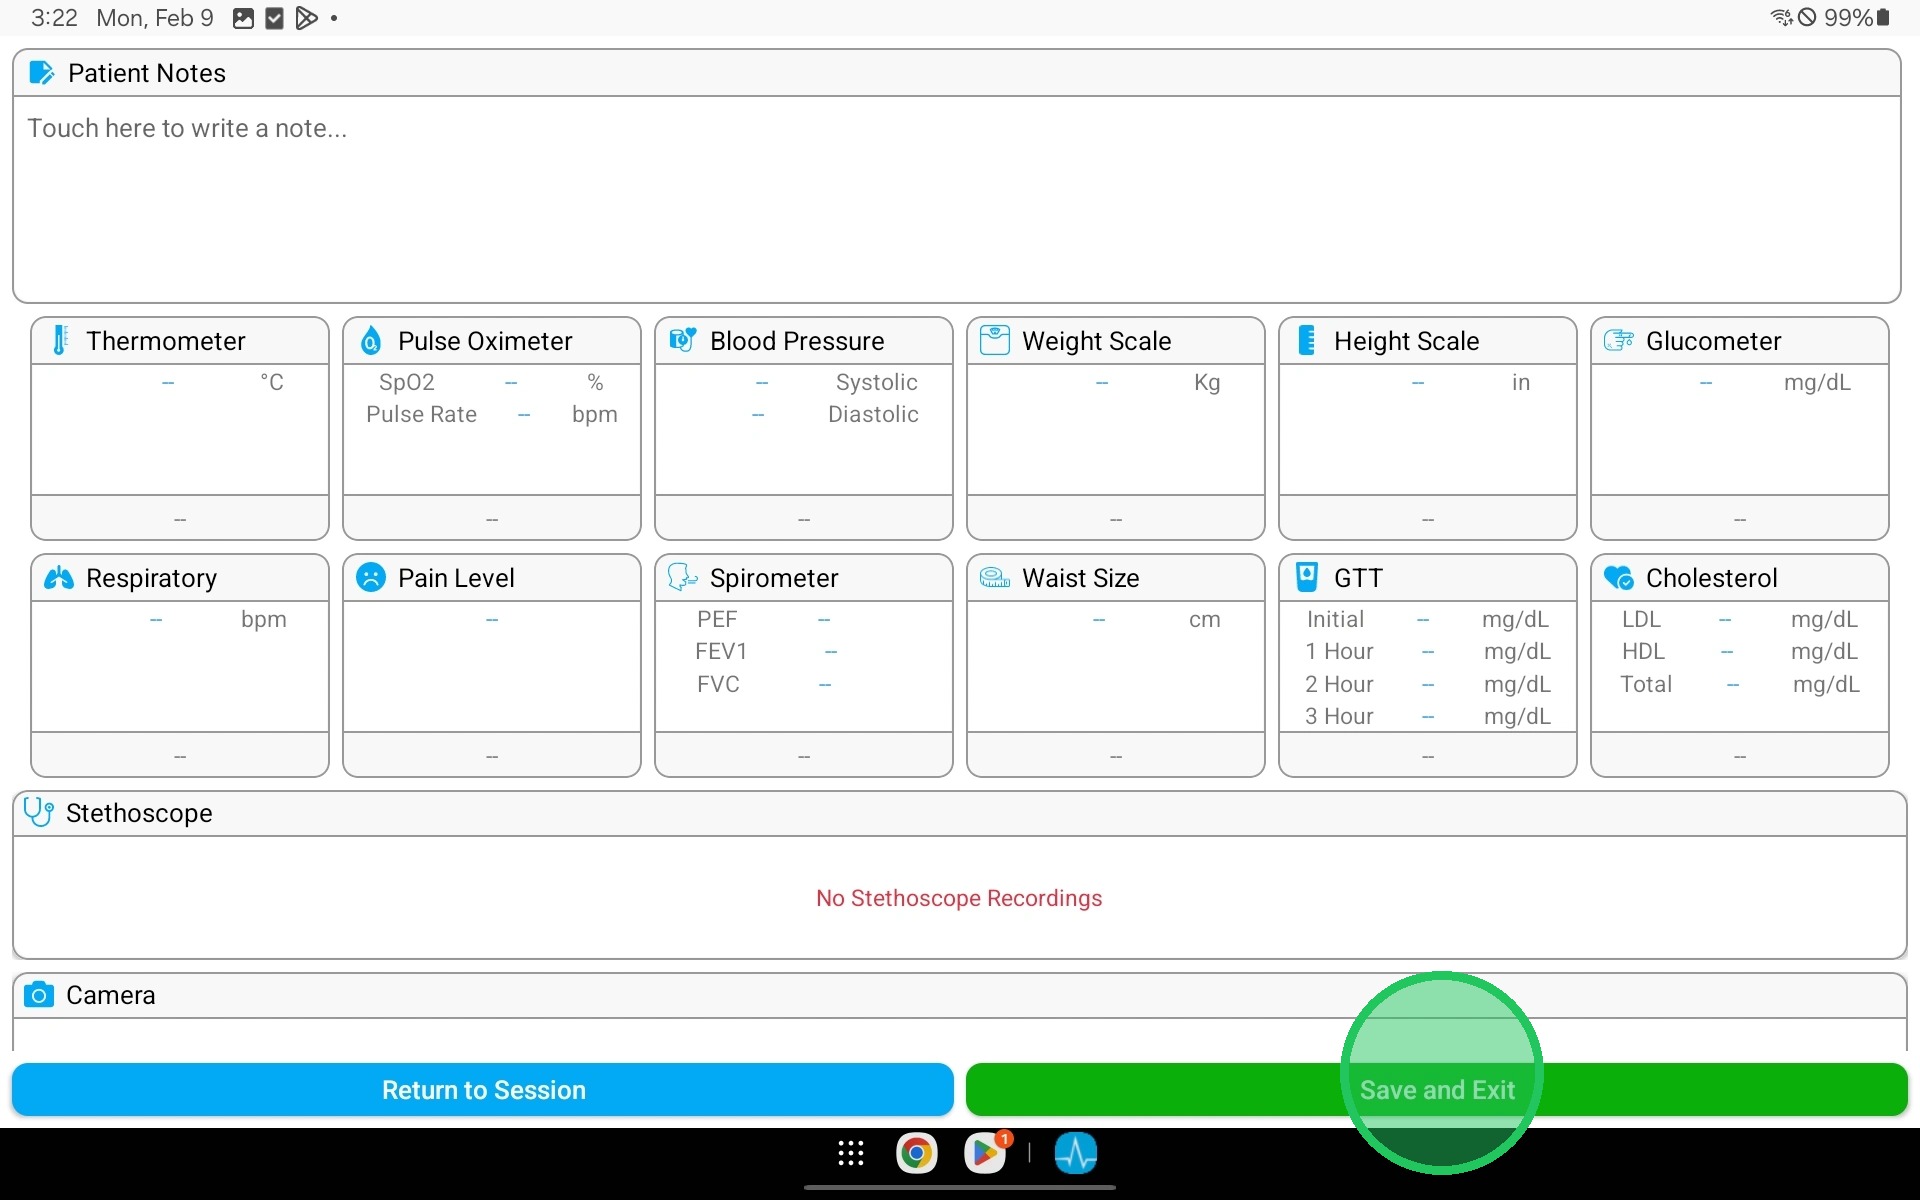
13. Select Save and Exit in the bottom right
Proceed to Step 21 - Reviewing Completed Exam Results
Inviting a Remote Clinician
14. To convert your Onsite exam into a full telemedicine visit and invite a remote clinician, select Invite in the top right corner.
Upon selecting the invite button, a six-digit invite code will be generated. You will need to provide this code to the remote clinician so they can join your exam.
Note*: Remain on this invite screen until the remote clinician joins. This page will automatically close once they have joined. If you select cancel, the invite will be revoked, and the clinician will not be able to join.*
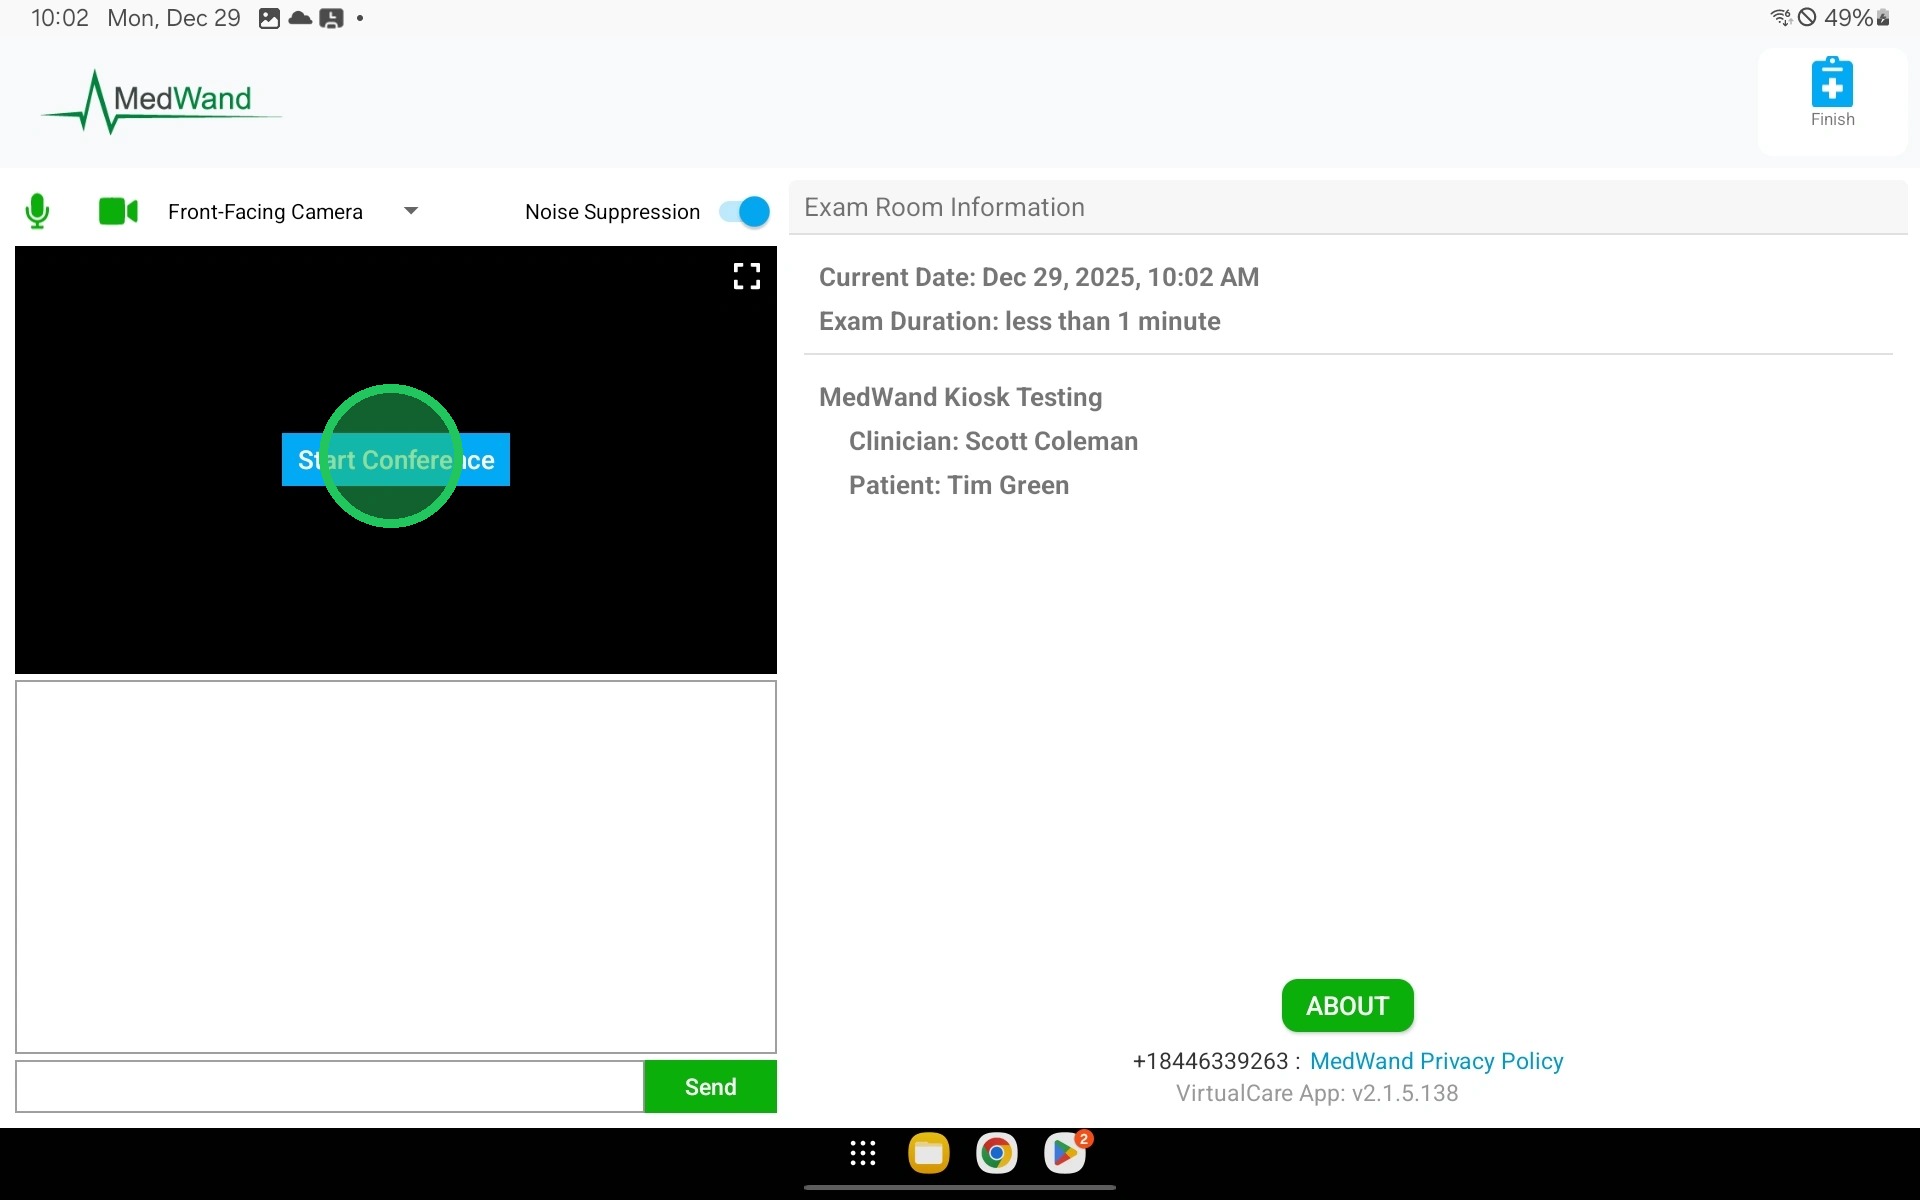
15. Once the remote clinician joins the exam, you will be presented with the screen below. Select "Start Conference" to enable audio and video chat.
Note*: In a full telemedicine visit, the remotely connected clinician has control of the MedWand.*
Joining as the Remote Clinician
16. There are two methods for joining an Onsite exam as a remote clinician.
Option 1
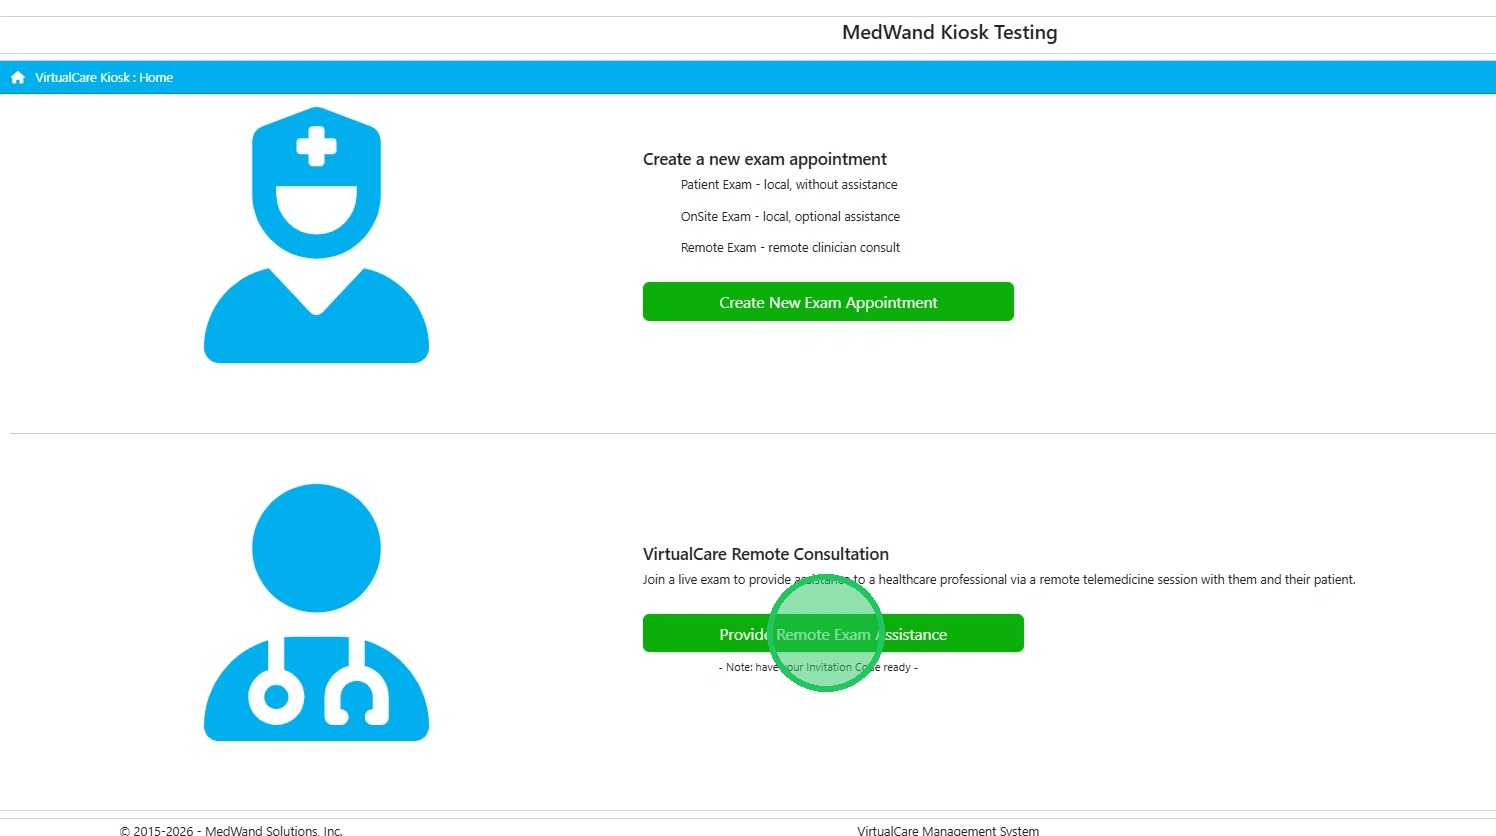
Navigate to the home page of your KIOSK portal https://portal.medwand.com and select "Provide Remote Exam Assistance" then enter the provided six-digit code from the onsite care team or patient.
Note: We strongly encourage the use of Chrome as it's the most stable browser and will provide the best experience. Other web browsers can be used, however, you may run into performance issues in the exam room.
17. Option 2
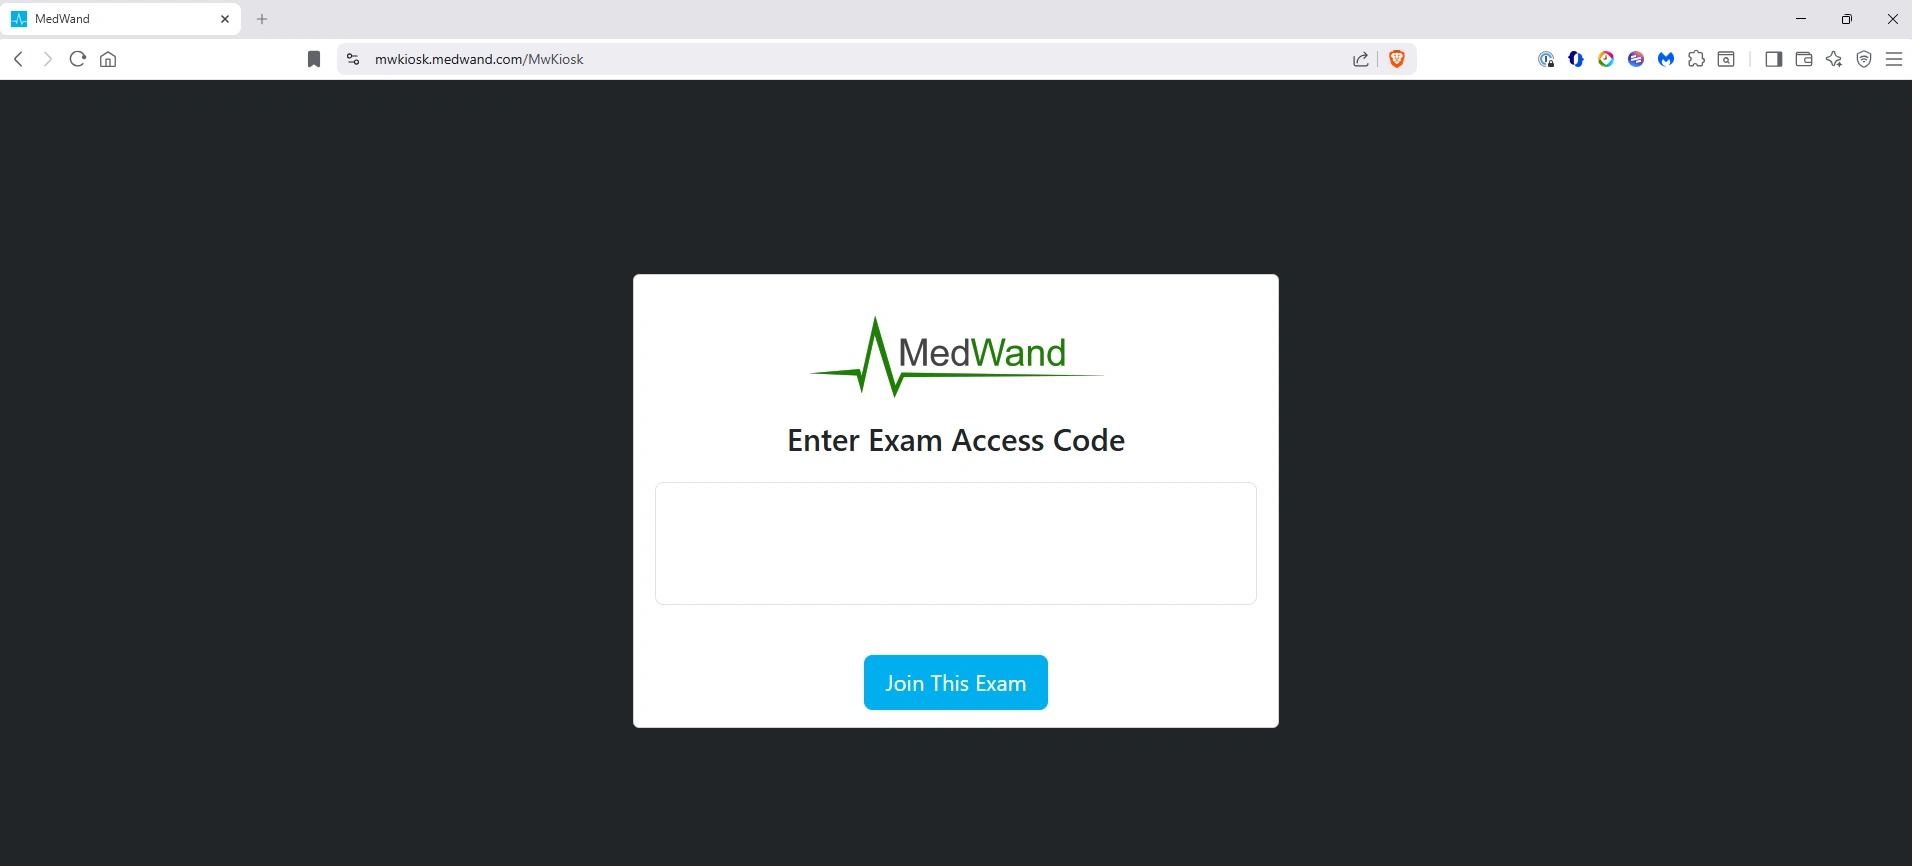
Navigate to https://mwkiosk.medwand.com/ in your Chrome web browser and enter the six-digit join code.
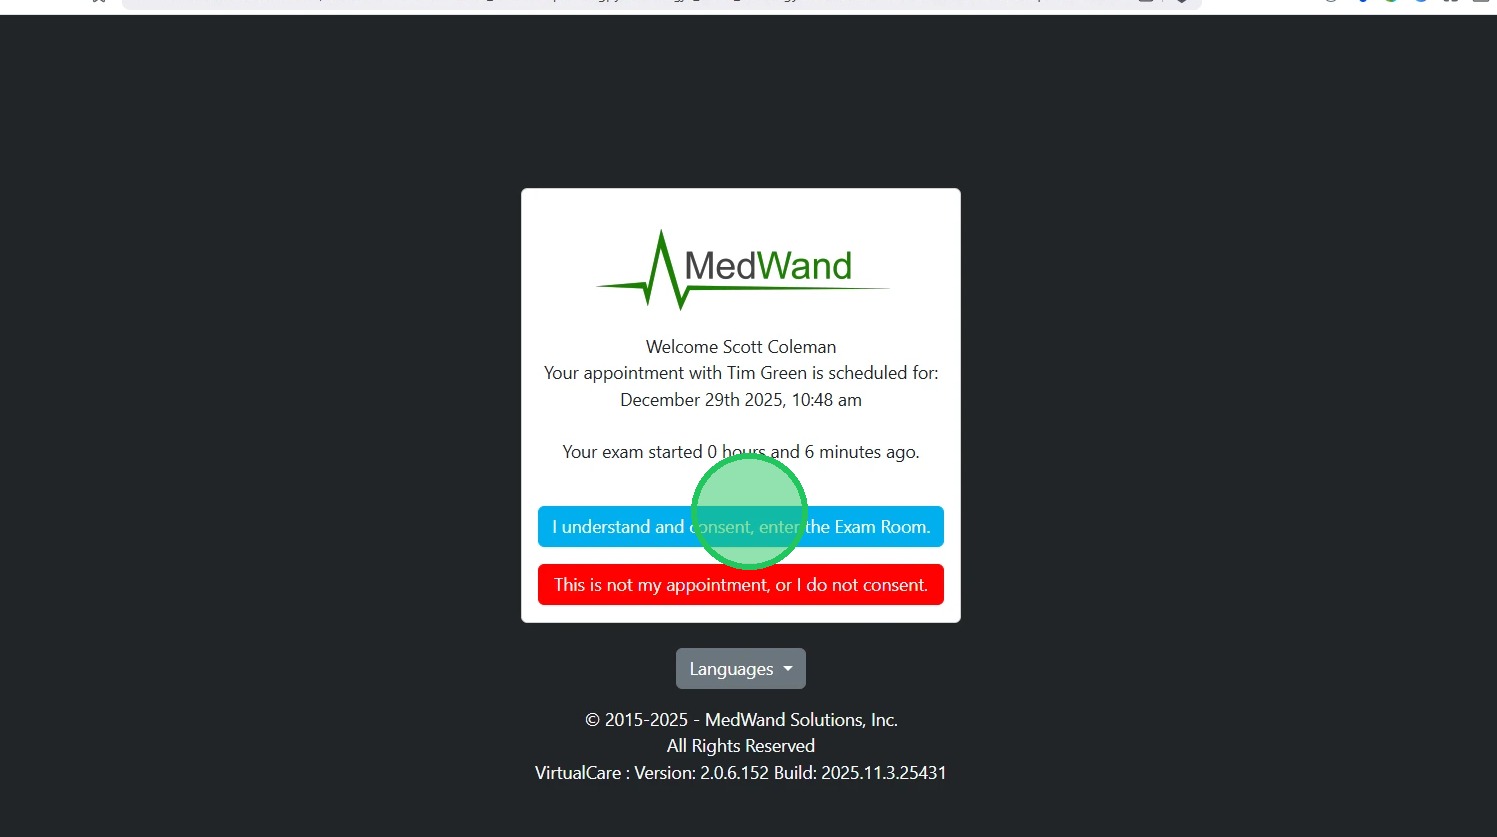
18. Upon launching the Exam Room, select "I Understand and Consent, Join the Exam" on the presented consent screen.
19. Be sure to allow any permissions requested by your web browser. Upon joining the exam, you will need to select "Start Conference" on the left to initiate the audio-video conference with your patient.
In this example, you'll notice that the toolbar is grayed out. This is because the patient hasn't joined the exam yet. Once the patient has joined you'll see the ToolBar unlock and the status next to their name will change to "Online".
As the remote clinician, you now have full control over the MedWand. You can review any vitals that were collected prior to you joining by selecting "Summary" in the top navigation bar. You can also collect or redo any vitals by selecting the appropriate sensor in the navigation bar.
Ending the Exam
20. Once you've collected all of the necessary vitals and you're ready to end the exam, select "End Exam" in the top toolbar, or "Save Data and Exit" if you're on the summary screen. This will end the exam and send a signal to the patient's mobile device to upload the exam data.
Note: It's important that the patient keeps the VirtualCare app open and their device powered on until their exam results have finished uploading. They will receive a message on their screen once the process has been completed.
Reviewing Completed Exam Results
21. Open your MedWand Portal and navigate to the "Exam Results" tab in the top navigation bar.
Select the blue "View Results" button next to the desired appointment. This will launch an HTML view of the collected results in your browser.
Note: The MedWand Portal only stores exam results for 30 days. If results need to be maintained for a longer period, see the next step for instructions on how to download the results.
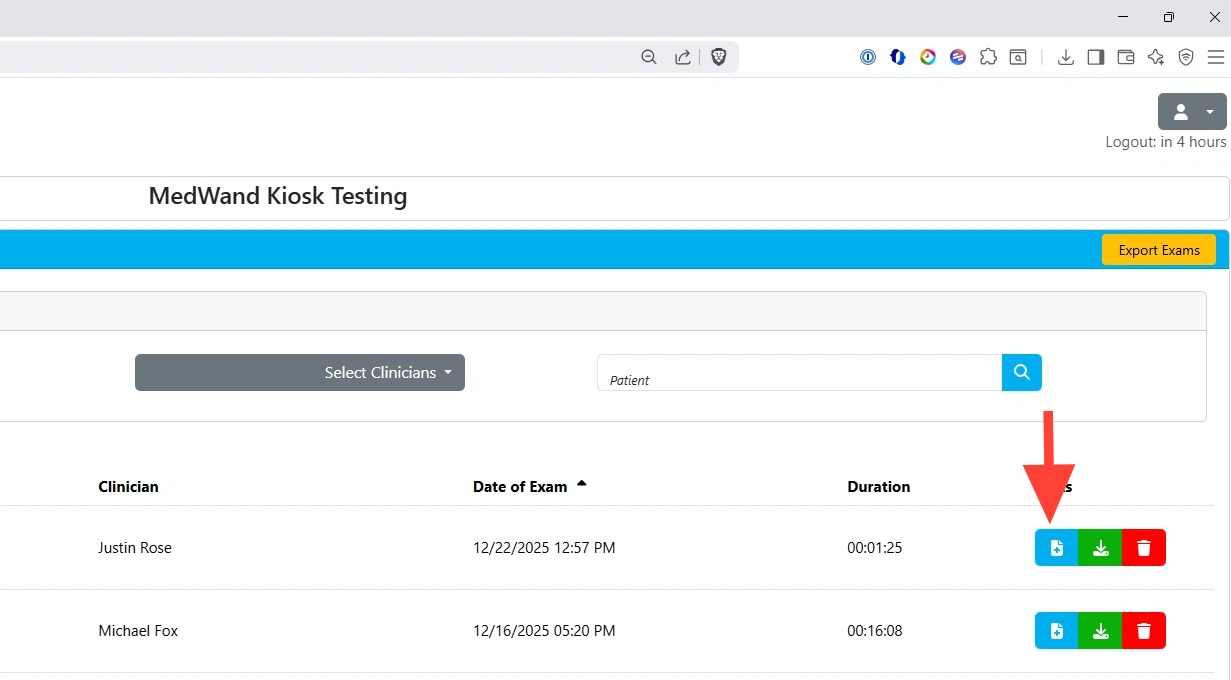
22. To download exam results, select the green "Download" button to the right of the desired exam.
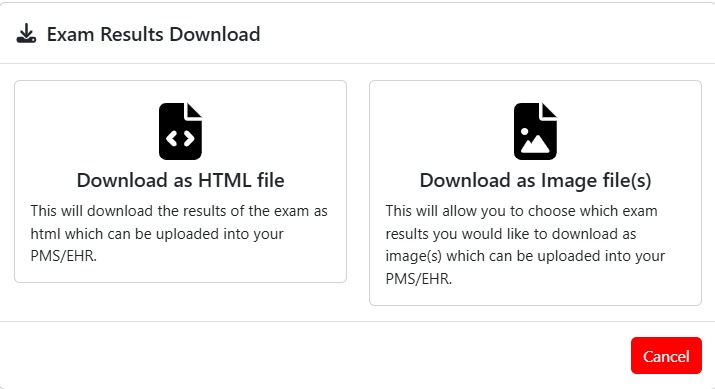
23. Select one of the available options
Download as HTML File - Allows you to download all of the exam results as a single HTML file that can be opened in a standard web browser.
Download as Image File(s) - Allows you to download individual vitals as media files. This is useful if you only need to save certain readings from the exam or you're unable to use HTML files.
Related Articles
MedWand KIOSK - Creating and Joining a Remote Exam
MedWand KIOSK - Creating and Joining a Remote Exam Below are written instructions to guide you through the process of creating a Remote Exam and the joining process from both the patient and clinician perspectives. Below are links to our video ...MedWand KIOSK - Creating and Joining a Patient Exam
Creating and Joining a Patient Exam Below are written instructions to guide you through the process of creating a Patient Exam within the MedWand Kiosk and providing your patient with the 6-digit code to join the exam. The Patient Exam type is ...MedWand KIOSK Guide
MedWand KIOSK Interface Guide This guide provides a high-level overview of the MedWand KIOSK software and interface, which is used by non API integrated customers for managing MedWand Exams and their accompanying results. For detailed guides by exam ...MedWand Exam Types
There are three MedWand appointment types that can be scheduled for exams. Patient Exam - an exam appointment where no healthcare professional will be involved, and the patient is expected to use the MedWand device to collect vitals by themselves. ...OnSite Exam Tutorial
Transcription Performing an onsite exam begins by using a browser to navigate to the exam code entry page, typically located at mwkiosk.medwand.com wand.com unless instructed otherwise. Here you will enter your six digit exam access code that should ...